OpenClaw Sandbox Setup: Docker & Isolation Guide
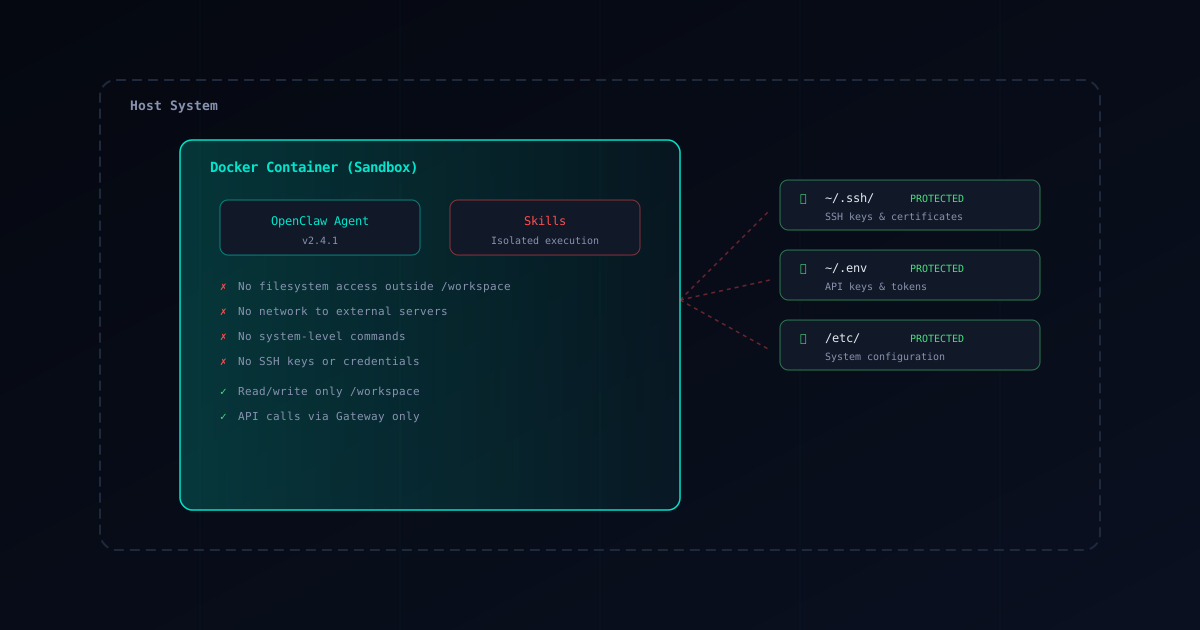
Running OpenClaw inside a sandbox is the most effective way to protect your system from malicious skills. This guide covers Docker-based isolation, network restrictions, and filesystem permissions.
Why Sandbox OpenClaw?
When OpenClaw executes skills, those skills run with your user privileges. A malicious skill can:
- Read and exfiltrate any file your user can access
- Execute arbitrary commands
- Install persistent backdoors
- Access your network and cloud credentials
A sandbox limits the blast radius of any compromise.
Quick Start: OpenClaw Built‑In Sandbox (recommended)
OpenClaw supports tool sandboxing via Docker. The Gateway stays on the host, but tool execution runs inside an isolated container when sandboxing is enabled.
1) Enable sandboxing in config (~/.openclaw/openclaw.json):
{
  "agents": {
    "defaults": {
      "sandbox": {
        "mode": "non-main",
        "scope": "session",
        "workspaceAccess": "none"
      }
    }
  }
}
What this does:
mode: "non-main"— sandbox everything except your main sessionworkspaceAccess: "none"— tools run in~/.openclaw/sandboxes(agent workspace is not mounted)
2) Build the sandbox image once
Follow the official OpenClaw sandboxing doc for your install type (npm vs source): https://docs.openclaw.ai/gateway/sandboxing
Custom OpenClaw Docker Image
For more control, create a dedicated Dockerfile:
FROM node:20-slim

# Install OpenClaw
RUN npm install -g openclaw@latest

# Create non-root user
RUN useradd -m -s /bin/bash clawuser
USER clawuser
WORKDIR /workspace

# Default command
CMD ["openclaw", "start"]
Build and run:
docker build -t my-openclaw-sandbox .
docker run -it --rm \
  -v $(pwd):/workspace \
  --network=none \
  my-openclaw-sandbox
Network Isolation
Completely Offline
For maximum security, disable all networking:
docker run --network=none ...Skills that require network access will fail — this is intentional. If a skill legitimately needs network (e.g., for API calls), evaluate carefully before enabling.
Selective Network Access
If you need some network access, use firewall rules:
# Create a restricted network
docker network create --internal openclaw-net

# Allow only specific domains
docker run \
  --network=openclaw-net \
  --add-host=api.github.com:140.82.121.6 \
  ...
Filesystem Permissions
Read-Only Project Mount
Mount your project as read-only and only allow writes to specific directories:
docker run -it --rm \
  -v $(pwd):/workspace:ro \
  -v $(pwd)/output:/workspace/output \
  --network=none \
  my-openclaw-sandbox
Exclude Sensitive Files
Create a .dockerignore-style approach by selectively mounting:
# Only mount source files, not credentials
docker run -it --rm \
  -v $(pwd)/src:/workspace/src \
  -v $(pwd)/package.json:/workspace/package.json:ro \
  --network=none \
  my-openclaw-sandbox
Never mount:
~/.ssh/~/.aws/~/.config/gcloud/- Any
.envfiles ~/.netrc
macOS Sandbox (Without Docker)
On macOS, you can use the built-in sandbox mechanism:
# Create a sandbox profile
cat > openclaw-sandbox.sb << 'EOF'
(version 1)
(deny default)
(allow file-read* (subpath "/workspace"))
(allow file-write* (subpath "/workspace/output"))
(allow process-exec (literal "/usr/local/bin/openclaw"))
(deny network*)
EOF

# Run with sandbox
sandbox-exec -f openclaw-sandbox.sb openclaw
Linux: Firejail
Firejail provides lightweight sandboxing on Linux:
# Install firejail
sudo apt install firejail

# Run OpenClaw sandboxed
firejail --noprofile \
  --net=none \
  --private-dev \
  --private-tmp \
  openclaw
Verify Your OpenClaw Sandbox Works
Test that your sandbox actually works:
# Inside the sandbox, try these (should all fail):
curl https://example.com          # Network should be blocked
cat ~/.ssh/id_rsa                 # SSH key should be inaccessible
ls /                              # Root filesystem should be restricted
Automate OpenClaw Sandbox Workflows
Add sandbox to your development workflow:
{
  "scripts": {
    "claw": "docker run -it --rm -v $(pwd):/workspace -w /workspace --network=none my-openclaw-sandbox",
    "claw:net": "docker run -it --rm -v $(pwd):/workspace -w /workspace my-openclaw-sandbox"
  }
}
Use npm run claw for sandboxed (default) and npm run claw:net only when network access is explicitly needed.
Related Guides
- Security Guide — Full threat landscape and hardening strategies
- Credential Protection — Protect API keys and tokens from exposure
- Skill Verification — Check skills for malware before installing
- Installation Guide — Set up OpenClaw from scratch
- Verified Skills Catalog — Browse security-audited skills